|
|
|
Project: Plant Buddy
|
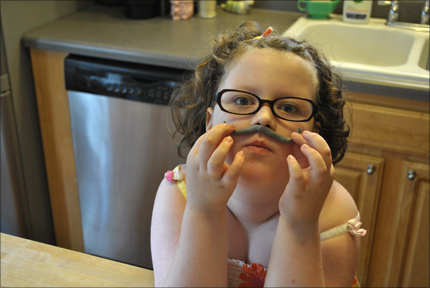
Summer's here and Eleanor and I like to make little things to pass the time. We originally made little terrarium accessories out of polymer clay. We made mushrooms, snails, and little houses, and stuck them in the terrariums. Problem was, while they initially looked great in their little enclosed terrariums, later on I noticed that green stuff of the not-so-attactive kind started growing on them. Ugh. Instead of totally scrapping the idea, I decided to modify it. Thus was born the plant buddy.

What you'll need:
- polymer clay (you can make most colors by mixing red, blue, yellow, black and white)
- a variety of clay working tools- whatever's handy
- 16-18 gauge aluminum wire
- needle nose pliers
- Optional: 26 gauge wire
|
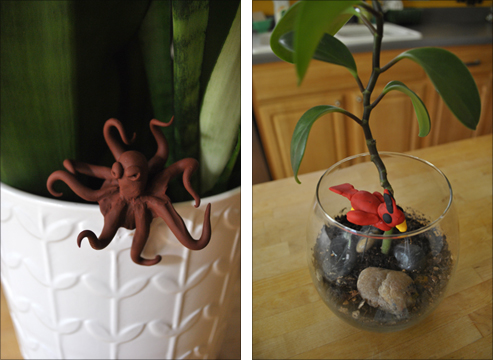
Step 1: The first step is to consider what to make. I looked at the plant (seriously!) What did it need? A bird, a miniature helicopter or airplane, a rain cloud (a thundercloud would be cute too), are all great ideas. You can also go a bit ridiculous. I made an octopus for Eleanor's Octopus Garden (scroll down to see). Once you've decided what to make, the rest is easy.
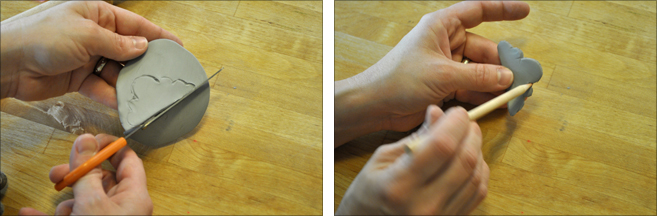
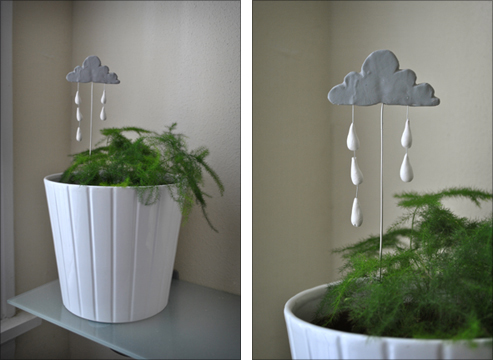
Step 2: I decided to make a rain cloud. Maybe it'll remind me to water my plants more often. I kneaded my clay to soften it, rolled it out to about 1/8" thickness, making sure to pick it up and rotate it 45°after each roll to keep it from sticking to the table surface, and drew my cloud shape directly onto the surface of the clay.
|
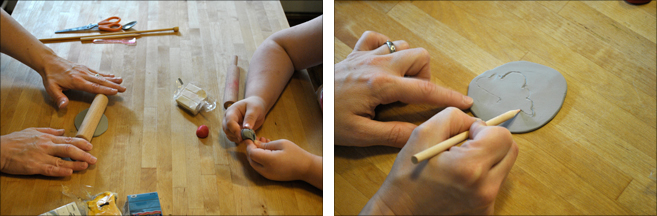
Step 3: I cut out my cloud with scissors (an x-acto knife also works) and smoothed the edges with a wood clay tool.
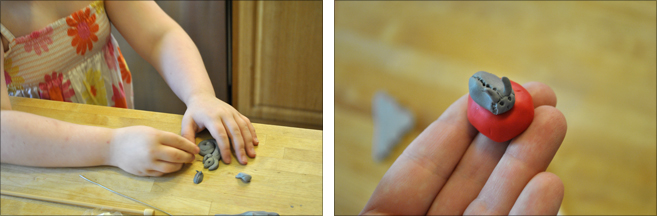
If you're working with a child, remember to look up from your project now and then. They're probably doing something amusing or dangerous. Kids are great, aren't they?
Another word of warning, if you're making a clay figure, be careful when joining pieces together that you smooth the edges where they connect with your finger or small tool. Really make sure they're connected well. You don't want those bits to pop off after you bake it.
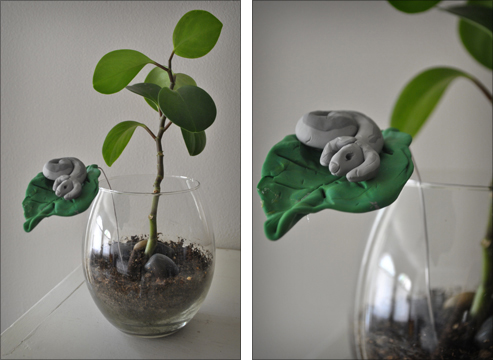
Eleanor made several creatures- a dog-snake and her version of a pill bug. Awww!
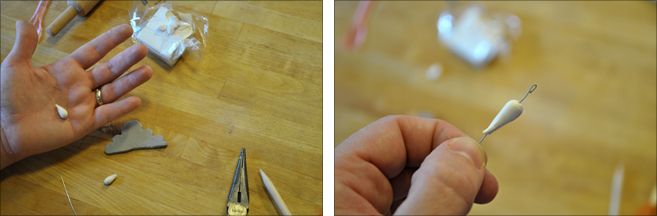
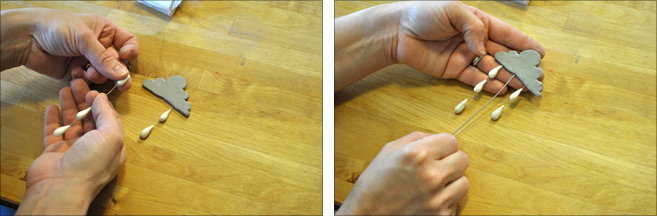
Step 4: For my rain cloud, I decided I needed to add raindrops to look as though they're pouring right out of that cloud. I used a thinner gauge wire to string them on so that the wire would be as close to invisible as possible. I created a hook at the end of the wire with my needle-nose pliers. This helps it become embedded in the clay and keep the clay attached to the wire. I made another hook at the other end of the wire to insert into the cloud. This is a really important step. If you don't do this, the wire will slide right out of the clay piece after you bake it.
Step 5: I cut a 12" piece of the 18 gauge aluminum wire, made another hook at the end and gently inserted it into the bottom of the cloud. It's important to consider how tall your plant is and where you want the plant buddy to sit in relation to the plant.
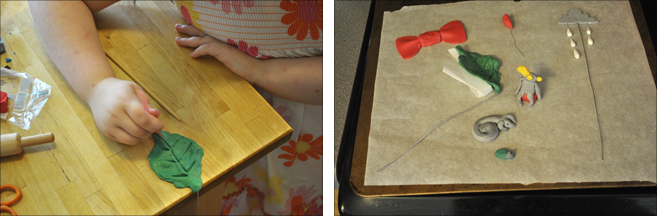
Eleanor decided that her dog-snake needed a leaf to recline on.
Step 6: I baked the pieces according to the directions on the package. Typically polymer clay bakes at 230°F - 275°F for 30 minutes per 1/4" thickness or 60 minutes for 1/2" thickness (go by the thickest part of your piece). I lined a baking sheet with baking paper and supported Eleanor's leaf with more baking paper.
Step 7: I let the pieces cool and harden for at least an hour before I stuck them into their new plant homes. There isn't a single plant in our house that isn't adorned with one of these now. Plant buddies...your plants will never get lonely again.
|
|
Poopscape is written by Claire Chauvin, a craft-obsessed mother and photography teacher living in Houston, Texas. If you have a question or a compliment, have tried one of my projects and want to share with me, or just want to chat, please email me at claireATpoopscape.com.
|